 Solar Panel Installation: A comprehensive guide to our process
Solar energy is becoming an increasingly popular alternative to traditional energy sources. It’s a clean, renewable, and cost-effective way to power your home or business. But how do you go about installing solar panels? Let’s explore the process of solar panel installation, from start to finish.
Step 1: Designing the Solar System
The first step in solar panel installation is designing the solar system. This involves a site assessment to determine the best location for the solar panels and the optimal size of the solar system. Factors such as roof pitch, shading, and orientation are all taken into consideration.
Once the site assessment is complete, the solar installer will create a custom solar system design that meets the client’s energy needs and fits the available space. This design will include the number of solar panels, the type of solar panels, and the necessary equipment, such as an inverter and battery storage system.
Step 2: Obtaining Permits and Approvals
Before solar panel installation can begin, the installer must obtain the necessary permits and approvals from local government agencies. This typically involves obtaining a building permit and an electrical permit, as well as complying with any zoning and building codes.
The solar installer will also need to work with the local utility company to obtain approval for interconnecting the solar system with the grid. This involves submitting an application and providing documentation of the solar system design.
Step 3: Installing the Solar Panels
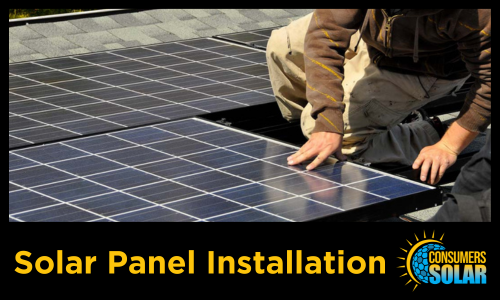
Once the permits and approvals are in place, the solar installer can begin the actual installation of the solar panels. The installation process typically involves the following steps:
Roof preparation: The roof is prepared for solar panel installation, including cleaning and sealing any penetrations.
Mounting the solar panels: The solar panels are mounted on the roof or ground using racking systems, which secure the panels in place.
Wiring the solar panels: The solar panels are wired together in a series or parallel circuit to create a solar array.
Installing the inverter: The inverter is installed to convert the DC power generated by the solar panels into AC power that can be used in the home or business.
Connecting to the grid: The solar system is connected to the grid through a net metering agreement, which allows the homeowner or business owner to receive credit for excess energy generated by the solar system.
Step 4: Testing and Commissioning
After the solar panels are installed and connected to the grid, the solar installer will test and commission the system to ensure that it is working properly. This involves verifying that the solar panels are generating the expected amount of power, that the inverter is functioning correctly, and that the solar system is interconnected with the grid.
Step 5: Maintenance and Monitoring
Finally, after solar panel installation is complete, the solar installer will provide ongoing maintenance and monitoring services to ensure that the solar system continues to operate at peak efficiency. This may include regular inspections, cleaning the solar panels, and monitoring energy production to identify any issues or potential problems.
 Solar panel installation is a complex process that requires careful planning, design, and installation. By working with an experienced solar installer, homeowners and business owners can ensure that their solar system is installed correctly and efficiently, providing clean, renewable energy for years to come. Get a free quote today by calling Consumers Solar at 231-233-6886 or contact us online.


